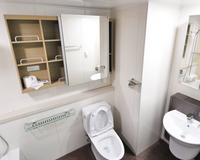
ADA grab bars look simple, so crews often treat them like standard bathroom hardware. That mindset creates expensive callbacks, frustrated inspectors, and unsafe restrooms. You can prevent most problems with careful layout, solid backing, and a disciplined install process.
You also need to think like the end user. People rely on grab bars during a fall, during a transfer, or when balance fails without warning. When a bar sits in the wrong spot or flexes under load, the restroom stops working for the people who need it most. Learn the common mistakes when installing ADA grab bars so you can avoid making them.
Mistake 1: Treating “Close Enough” as a Measurement Strategy
Installers sometimes eyeball placement after they mark a wall once. That approach invites drift, especially when tile lines, partitions, and fixtures pull your eye off square. ADA work rewards precision, so you should measure from defined reference points every time.
Start with the finished floor, the centerline of the toilet, and the back wall. Use a level and a tape you trust, then mark every fastener location with intention. When you move from one restroom to the next, repeat the layout instead of copying marks from memory.
Mistake 2: Using the Wrong Reference Surface
Crews sometimes measure from the subfloor, not the finished floor, and they end up with bars that sit too high. Tile thickness, underlayment, or a raised threshold can shift heights enough to trigger a correction. You also can’t rely on a baseboard or cove base as a measuring point.
Measure from the finished floor after the flooring crews finish their work. If the schedule forces an early install, document your assumptions and verify final elevations before you drill. A few minutes of coordination saves hours of rework.

Mistake 3: Placing the Bar Where the Hand Never Goes
A compliant height means little if people can’t grip the bar during a transfer. Many installers center the bar visually on a wall panel or align it with a tile course, then they miss the functional grip zone. ADA placement depends on the toilet location and the transfer approach, not on symmetry.
Lay out the rear-wall and side-wall bars based on the toilet centerline and the required offsets for that configuration. Keep the bar where a user naturally reaches when shifting weight. When you install commercial restroom grab bars, prioritize function over aesthetics.
Mistake 4: Ignoring Clearance and Obstructions
Even when a bar sits in the right spot, nearby obstructions can ruin usability. Dispensers, coat hooks, door swings, and partition edges can crowd the grip area. Installers sometimes discover the conflict after they mount the bar, then they scramble for a compromise that fails inspection.
Review the whole wall before you drill. You need clear space for a full hand grip and a comfortable wrist angle. When you coordinate accessories early, you avoid the domino effect of moving one item and breaking another requirement.
Mistake 5: Drilling Into Tile Without a Plan
Tile demands patience and the right tools, yet installers often rush the first hole. A cracked tile costs time and goodwill, and a chipped edge can trap moisture. The fastest path often starts with a slower first step.
Use the right bit, control speed, and keep the drill stable. Mark holes precisely, then confirm your marks one more time before you commit. When you protect the finished surface, you protect the schedule.
Mistake 6: Skipping Solid Blocking or Using Weak Backing
Grab bars don’t behave like towel bars. They must handle real load without flex, movement, or fastener pullout. Crews sometimes rely on drywall anchors, thin plywood, or whatever backing they find behind the wall.
Plan blocking during framing whenever the project allows it. If you work on a retrofit, open the wall where needed and add backing that supports the mounting points. When the wall structure supports the bar, the bar can support the user.
Mistake 7: Choosing the Wrong Anchors for the Wall Type
You can’t use one anchor system for every wall. Tile over cement board, stainless panels over studs, and masonry each demand different hardware and torque. Installers sometimes default to the anchors that came in the box, even when the wall demands something stronger.
Match the anchor and fastener to the substrate. Follow the manufacturer’s hardware specs for that model, and keep consistent torque across all mounting points. When you use the right hardware, you reduce movement and prevent long-term loosening.
Mistake 8: Mounting Flanges That Don’t Sit Flush
A flange that rocks or gaps almost always signals a wall issue or a drilling issue. Installers sometimes tighten harder to force a flange flat, and they strip a fastener or crack a tile. That bar might look fine at first, but it can loosen quickly.
Fix the root cause instead of muscling the hardware. Confirm that the wall surface sits flat and that your holes align with the fasteners. When you seat the flange cleanly, you get stability without damage.

Mistake 9: Forgetting the Bar Diameter and Grip Comfort
ADA requirements address the diameter because grip matters. Some teams pick bars that look sleek but feel awkward in the hand. Others mix bar sizes in the same restroom because they replace a damaged unit with a mismatched model.
Select a diameter that supports a natural grip for a wide range of users. Keep the same style and size across the restroom when the design allows it. When you keep grip consistent, users don’t have to adjust their hands in the middle of a transfer.
Mistake 10: Installing the Wrong Orientation or Length
Installers sometimes swap a side-wall bar and a rear-wall bar by mistake, especially when boxes stack in a storage area. Others trim corners with a shorter bar because it fits an existing backing location. Those choices can break the required layout.
Confirm length and orientation before you carry the bar into the room. Cross-check the plan with the product label, then stage each bar outside the correct stall. When you control staging, you prevent mix-ups.
Mistake 11: Overlooking Door and Partition Interaction
Stall doors and partitions create real-world constraints that drawings don’t always capture. A door swing can block approach space, and a partition return can limit reach. Installers often discover the interference after they mount the hardware.
Open and close the door during layout, not after installation. Watch the door path, check latch clearance, and confirm that users can reach the bar without twisting awkwardly. When you validate movement early, you avoid late surprises.
Mistake 12: Failing the “Grab and Shake” Reality Check
A bar can pass a quick visual inspection and still fail in use. Installers sometimes skip physical checks because they worry about damaging a finished wall. That decision leaves the first real “test” to an inspector or, worse, to a user.
Grab the bar with both hands and apply firm, controlled force. You should feel no shift, no creak, and no flange movement. If you detect movement, fix it immediately and retest until the bar feels solid.
Mistake 13: Assuming the Inspector Will Interpret Intent
Some teams rely on “common sense” arguments when a dimension lands slightly off. Inspectors don’t evaluate intent; they evaluate compliance and safety. If you install bars without documenting field conditions, you limit your options when questions arise.
Keep your measurements consistent, and take photos of layout marks before you drill. Note any constraints that affect placement, such as plumbing vents or structural members. When you document decisions, you support smoother closeout conversations.
Mistake 14: Neglecting Maintenance After Installation
Even a great install can degrade with time if nobody checks the hardware. High-traffic restrooms expose grab bars to repeated stress, aggressive cleaning, and occasional vandalism. If a facility ignores small issues, those issues grow into safety risks.
Encourage facility teams to add grab bars to their routine checks. They should look for loosened screws, shifting flanges, and corrosion around mounting points. When teams address problems early, they avoid downtime and liability.
A Practical Wrap-Up for Better Installs
Most common ADA grab bar installation problems come from rushed layout, weak backing, and poor coordination with surrounding accessories. You can avoid those pitfalls when you measure from the right reference points, match hardware to substrates, and test stability before you leave the site. That approach protects users and protects your schedule.
If you want help choosing compliant commercial bathroom grab bars for a specific wall type or project condition, Choice Builder Solutions can support the selection process and help you source the right configuration. Our selection will ensure you find the right one for your commercial restroom.